Monday, February 20, 2012
I'm a slacker
Sunday, January 22, 2012
Ridiculously Easy Recipe: Bodacious Blueberry Crepes!
That being said, you can eat almost anything when “on plan.” For example, these amazing blueberry crepes I made for Jeff and me after dinner tonight. Fresh blueberries simmered on the stove with powdered sugar, grated ginger, lemon zest and a pinch of cinnamon is our filling. Our shell is a crepe, a thin pancake that is quick cooked on the stove-top. Both recipes I modified from existing Weight Watchers recipes.
Who says a girl can’t have her crepe and eat it too?
Blueberry-Filled Crepes
Serves 2 or 4 (depending on how hungry you are!)
For the filling, you will need:
2 cups, or one pint, fresh or frozen blueberries
½ cup powdered sugar
2 tablespoons water
Zest of one lemon
1 teaspoon grated ginger
1/8 teaspoon (just a dash really!) ground cinnamon
1) In a small saucepan, combine blueberries, sugar and water on medium-low setting.
2) Cover.
3) Gradually add in the zest, and ginger.
4) Bring to a low boil, stirring occasionally.
5) Continue to cook until berries are soft and the sauce thickens slightly.
6) Remove from heat and stir in dash of cinnamon.
7) Serve immediately or store in the fridge for up to one week. Reheat on the stovetop or in the microwave for 90 seconds, stirring often.
For the crepes, you will need:
1/3 cup all-purpose flour
½ cup fat free milk
2 eggs or 6 egg whites (I used one egg and 3 egg whites)
1 teaspoon vanilla extract
2 teaspoons granulated sugar
¼ teaspoon baking powder
1) In a bowl combine all ingredients listed. The batter will be thin, almost watery.
2) Heat a large (12”) skillet on medium and spray very liberally with cooking spray.
3) Pour ¼ cup batter in hot skillet and immediately swirl the pan, distributing the batter to the edges of the pan.
4) As the edges start to curl, slowly run a rubber spatula under the crepe to loosen.
5) You can flip the crepe once the underside is slightly golden brown.
6) Cook the other side, and slide onto a plate.
7) Repeat with the remaining batter, 4 crepes total
To serve, lay one crepe flat on a plate and spoon 2 tablespoons of warm or chilled blueberry sauce up the middle. At this point you could also add 2 tablespoons of cottage cheese or some other sweet cheese filling. Fold the crepe and top with a sprinkle of powdered sugar, an additional tablespoon of blueberry sauce, and/or vanilla ice cream. Serve immediately.
Yields 1 crepe shell and 3 tablespoons blueberry sauce per serving.
Simple, delicious, done!
XOXO
Shauna E!
Quick and Dirty Q & A
Q. What are some other fillings I could use in this recipe besides blueberries?
A. I chose blueberries for their color, flavor, and texture. I love warmed blueberries and they way they pop in your mouth! I also chose blueberries because they have very few seeds as opposed to their other berry counterparts. That being said, one could use any sort of berry-fruit such as blackberries, raspberries, or strawberries. One could also use pears, peaches or mangos as well. As always make sure your fruits are blemish-and-bruise free! If you do choose to use a seedier berry, you can push the warmed sauce through a mesh strainer to catch some of the hard seeds. The sauce will be less chunky in this instance, however.
Questions? Comment below!
Wednesday, January 18, 2012
Ridiculously Easy Recipe: Positively Pop-able Mini Quiches

I have a problem getting up before ten in the morning. I guess it’s leftover from my college days when I strategically picked classes that started at noon, coupled with my love of staying up all night burning my eyeballs on the computer monitor.
My shifts at work normally start at eleven, so very rarely do I get up in time to both get myself ready AND have a healthy breakfast. Breakfast for me is normally a cup of drive-thru Dunkin Donuts ice coffee! But since it is a new year, I’ve been trying hard to cook more and, in turn, eat more breakfast.
These miniature quiches I made today are definitely going to help in my quest for that first meal of the day. Adapted from this quiche recipe from the Egg Beaters website, it combines crisp bacon, creamy mozzarella cheese, and fresh, chopped broccoli for a unique weekday treat or even something worthy of company for a weekend brunch! Pair these with skillet hash browns, or even a small salad or fresh fruit.
I opted to make these in my mini muffin tins and regretted it. While the flavor was there (and if I do say so myself, this flavor combo is DELICIOUS), I felt as if I had to eat 5 or 6 to felt satisfied. I think next time I will definitely make them in my 12-cup instead, or even in a skillet like my sister does!
Mini Crust-Less Bacon, Broccoli and Cheese Quiches
You will need:
1 carton, 16oz, egg substitute (Such as Egg Beaters, I used cheddar and chives flavored)
1/2 cup chopped broccoli
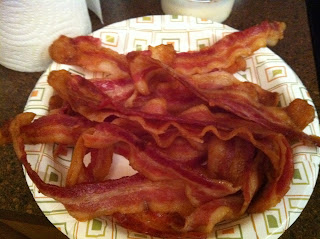
1/2 cup crumbled bacon or 1/4 cup bacon bits (from the jar)
1/2 cup shredded mozzarella cheese
Cooking spray
1. Preheat oven to 350 degrees.
2) Generally grease a 24 or 12-cup muffin tin with cooking spray.
3) Fill each cup 1/3 way with egg substitute.
4) In a bowl, mix cheese, bacon, broccoli and spices together.
5) Add 2 teaspoons of filling to each cup, and gently press in.
6) Bake in a preheated 350 degree oven for 18-20 minutes or until eggs appear puffy and golden brown.
7) Serve immediately or store in the fridge
Simple, Delicious, Done!
XOXO
Shauna E!
Quick and Dirty Q&A
Q. I don't eat meat, or I don't like broccoli. What other fillings could I use?
A. The possibilities for fillings in any quiche are ENDLESS! Substitute broccoli for frozen, chopped spinach (make sure you defrost first!), or even mushrooms, zucchini, or tomatoes. Trade the bacon for ham, smoked turkey, or crumbled sausage. Skip the meat entirely and just use leftover roasted veggies. I just used ingredients I had on hand. For example, I was originally going to use Mexican Four-Cheese blend for the cheese, but found a small amount of mozzarella in the drawer that needed to be used up first.
The trick is to make sure everything is chopped small, and not to overfill the muffin cups!
Q. You say to use what's on hand, but I don't have any Egg Beaters!
A. To make this recipe sans Egg Beaters beat 6 large eggs with about a 1/4 cup of milk. I like the Egg Beaters because they require no work on my end, and they are forever on sale at my Publix. But I will always advocate using what is on hand before running out to the store for just one ingredient!
Questions? Comment below!
Sunday, January 1, 2012
Ridiculously Easy Recipe: Zucchini and Sausage Skillet
HAPPY NEW YEAR, READERS! I hope 2012 makes all your dreams come true!
Zucchini was on sale for less than a dollar a pound this week at Publix. I love this mild tasting, versatile squash! It holds up very well whatever way you choose to cook it, whether it’s baking, boiling, grilling, or frying. Pan-frying the zucchini in garlic and olive oil creates a crispy crust while the inside remains tender and sweet. Paired with Italian sausage, this simple dish takes mere minutes to prepare and is just delicious.
This dish would be perfect with other fresh, sautéed vegetables such as mushrooms, summer squash or even green beans. I love making this with zucchini and sausage because of their similar shape when you cut them. Silly maybe, but it’s the little aesthetics that send some meals over the edge!
Zucchini and Sausage Skillet
Makes 2 servings
2 tbsp olive oil, separated
1 clove garlic, minced
2 Italian Sausage links, leftover or partially boiled*
2 medium zucchini squash
1 can diced tomatoes with basil and onion
Salt and pepper to taste
2 cups cooked pasta (I prefer linguini for this dish!)
*There is a little prep work involved in this dish. You will want to pre-boil the sausages for about 10 minutes or until they appear opaque (milky-white) in their casing. Allow to cool, then cut into “coins”, about ¼ to ½ inches thick.
1. Slice zucchini into coins, about the same thickness of the sausage. Toss with one teaspoon olive oil and sprinkle liberally with salt and pepper.
2. Preheat a skillet over medium heat, and add the reserved teaspoon of olive oil and garlic. Sauté until garlic is softened, about one minute.
3. Place the zucchini coins flesh side down and fry until golden brown, anywhere from one to two minutes. Flip over and sear other sides. You may need to do this in batches depending on how big your skillet is.
4. Add the cooked sausage coins and heat through. Plate the mixture over hot pasta (or omit for low-carb dieters!).
5. Heat the diced tomatoes in the same skillet, making sure to scrape up any garlicky bits from the bottom of the pan (extra flavor!)
5. Top the plated dish with heated tomatoes and serve.
Questions? Comment Below!
XOXO
Shauna
1.
Wednesday, December 28, 2011
Ridiculously Easy Recipe: Blue Cheese and Chive Steak Butter
My husband turned 26 this month and for his birthday I made bacon-wrapped steaks and macaroni and cheese for his special dinner. I’m a sentimentalist, and I can’t help thinking about the very first meal I made for him, back in the summer of 2004.
It was the weekend before he moved away to college, and my wonderful older sister offered us her apartment (She even bought us the beer to use as a base for the cheese). I made grilled steak strips and cheese fondue in one of those fondue pots with the little Sterno cans people used to give to one another at Christmas. By the end of the meal, the cheese was burnt to the bottom, but my, it was delicious! Years later, I realized that wasn’t exactly how fondue is done, but Jeff appreciated my efforts to woo him with food.
The steaks were a little pricier than I would normally buy, but it was a special occasion and still less expensive and more special than if we had gone to a local steak house. They were pre-bacon wrapped, seasoned with salt, pepper, and garlic, then quickly seared in butter on the stove top, and finished in a 400-degree oven to a perfect medium-rare for ten to fifteen minutes.
What really made these steaks pop was the blue cheese and chive butter I prepared in the morning. Creamy gorgonzola cheese with tangy chives is the perfect complement to the savory, rich taste of these steaks.
Spoiler alert! You will need at least 2 hours (prep plus chill time) to prepare this recipe!
Plan accordingly.
Blue Cheese and Chive Steak Butter
Makes (roughly) 12 servings
½ cup or 1 stick salted cream butter, softend
¼ cup gorgonzola, or other blue cheese
2 cloves garlic, very finely chopped or 2 tsp garlic powder
2 tbsp chopped chives
Sprinkle kosher salt
Ground pepper
1. In a small bowl or food processor, combine all ingredients but chives and mix until well blended and most of the blue cheese chunks are smoothed out. Stir in the chives last.
2. Spread butter into plastic wrap or parchment paper and twist into a log shape- about 6” long. Twist and seal the ends, then refrigerate for 2 hours or until set.
3. To serve, remove from the fridge and cut into ½ inch coins. Float on top of fresh-cooked steaks. The residual heat from the meat will melt the butter. Use one coin per 4 ounces of steak, or to your taste (we love butter!)
4. Re-wrap and use within a week, or freeze for up to a month.
Questions? Comment below!
XOXO
Shauna E!
Quick and Dirty Q&A
Q. I can’t find blue cheese or chives/ I don’t like blue cheese or chives. Any other suggestions?
A. If you aren’t a fan of blue cheese or onions, there are many other variations you could do. Try adding prepared horseradish and bacon bits (stir in at the end as if they were chives). Sundried tomatoes and parmesan cheese would be another great flavor combination. Replace the chives for parsley, dill, or rosemary. Replace the blue cheese with feta or finely shredded cheddar. The trick is to add each ingredient slowly and taste occasionally until you find a ratio that works for you.
Q. I don’t eat steak, but this butter sounds delicious. Any other uses for it?
A. Tons! You could use this butter to finish off grilled veggies, fish, chicken, or even pork. Replace it for normal butter (1-to-1) in recipes for pasta or rice. If you do choose to use it as a replacement, make sure you omit or adjust any garlic or salt so you don’t over season!
Sunday, December 25, 2011
Technique of the week: How-To Make Perfect Bacon
Mmm, bacon! It’s salty, it’s savory, it’s the perfect complement to most meals, especially the fabled brinner.
Initially, I began cooking bacon on the stove top, in a skillet. This led to more burns on my arms than I’d ever had working the popcorn machine at the movie theater. Bacon in a skillet is hard to keep from overlapping, and therefore you end up with many pieces burned, or worse, under-cooked.
Later on, I learned that bacon on an electric griddle works well, in a pinch. However, due to the lack of convection, you have to turn it half-way through and hope you that you or the bacon doesn’t get burned.
Finally after some research (a combination of internet queries and calling my cooking mentor aka my mother) I learned that the most uniform and crispy bacon is cooked in an oven! Seriously, the best solutions are always the most simple (and the laziest!) This technique is as simple as setting your kitchen timer.
Perfect Oven-Cooked Bacon
You will need:
1 lb bacon
1-2 foil-lined cookie sheets (for easy clean-up!)
Convection oven
DO NOT PRE-HEAT YOUR OVEN!
1. Arrange bacon strips in a single layer on foil-lined cookie sheets. (Use multiple cookie sheets if you need them-the trick is not to overlap the strips.)
2. Place cookie sheets in a cold oven, then crank the heat up to 400 degrees.
3. Walk away. I’m serious. Just walk away.
4. Let bake until crispy, about 20 minutes. Be sure to check on it around 15 minutes to insure it hasn’t begun to burn!
5. Allow bacon to cool, then pat off excess grease with paper towels.
6. Enjoy!
Questions? Comment below!
XOXO,
Shauna E!
Quick and dirty Q & A:
Q. Why shouldn’t I pre-heat my oven? Won’t the bacon undercook?
A. Slow-roasting the bacon is the trick here. A cold oven insures the bacon has enough time to cook through and crisp up without shocking it initially with too much heat (which will cause burning and chewy spots!)
Q. What kind of bacon is best to use?
A. I usually just buy whatever is on sale, but it is important to look at make sure there is a good meat-to-fat ratio on your selection. Some brands I tend to like are Smithfield, and Hormel.
This technique has been tested with pork bacon only, but one could presumably use it just as well with turkey bacon however I would recommend keeping a closer eye on the bacon to prevent burning, as turkey bacon has much less fat and will dry out faster!
Q. A pound of bacon is 16 slices, which is too many for me to eat in one setting. What can I do?
A. You have two options here. For one, you could use only half or a few slices of the bacon in the oven, then (tightly) wrap the package back up and pop it in your freezer to be used up at a later date. Be sure to use a smaller baking sheet and pay closer attention to the time to prevent overcooking.
The other option is to cook the entire pound at once, but slightly undercook it by a few minutes. Let the bacon cool completely, then freeze what you won’t use immediately and to de-frost, pop in a microwave for 30 seconds or until crispy.