Showing posts with label shauna e. Show all posts

Sunday, September 9, 2012

Technique of the Week: Outstanding Homemade Oatmeal Packs

It's obviously no secret that the more processed and convenient a food is, the more money it will cost. Diced celery will always cost a bucket-full more than it's stalk counterparts. Dried beans, while being more expensive per unit, will always be a better value than the canned stuff because of the amount of servings one bag holds. The cost of ingredients needed to make popcorn at home are still less than the bagged, microwave ready stuff. I could go on for hours, trust me...

Possibly the worst offender is pre-packaged oatmeal. These little envelops are chock full of calories, unnecessary additives for "freshness" and grossly overpriced. 10 tiny little packs for almost $5.00? You have to eat 3 of them to feel full! No way!

I learned awhile ago (total "duh" moment on my end!) that it's easier to just buy the tub of quick oats and make my own flavored oatmeal concoctions. A container of oats has about 30 servings and will run you around $2.50. Throw in some brown sugar, a bag of nuts, and some dried fruit and you're up to a little over $7.00 for three times as much oatmeal as the boxed stuff. The best part? YOU can control exactly how much sugar, sodium, and preservatives go into each pack, therefor making it loads healthier. Give it a try!

Pre-Portioned Oatmeal Packs


Makes 5 individual servings

You will need:

  • 5 sandwich or snack size zipper bags, or other small containers. 
  • 2.5 cups quick-cooking oats
  • 1/4 cup s dried fruit (I used cherry-infused cranberries)
  • 1/4 cup crushed nuts (I had macadamia nuts on hand but almonds, walnuts or pecans would be great)
  • 1/4 cup brown sugar 
  • Cinnamon, to taste
  1. In a medium bowl combine all ingredients, making sure the brown sugar breaks up and is distributed evenly with the oats. Portion into small containers, about a heaping 2/3 cup per serving. 
  2. When you're ready to eat pour the contents of the bag into a bowl, and add 1 cup of water. 
  3. Microwave in 20-second intervals until the water is absorbed, about 1 minute total. 
  4. Enjoy!
A few tips: The ratio of mix-ins to oats is perfectly optional. I know most people would probably enjoy much more sugar in their oatmeal, but I don't have big sweet tooth in the mornings so for me, less is more. If you don't like nuts, skip them! The one important thing to account for is the water. Making sure you double the amount of water to oats is crucial in having oatmeal that isn't too dry. 

If you want to save on the bags/containers, you can also just store the whole she-bang in a large canister and pull 2/3 cup of the mixture out each time you're ready to eat. I leave these on my desk at work so the more portable, the better!

Simple, delicious, done!

Love,

Shauna E

Wednesday, September 5, 2012

Ridiculously Easy Recipe: Pesto Pasta Salad


As summer draws to a close for the rest of the country, Florida summer rages on. Today the temperature was 86 degrees and it won’t be getting any cooler for at least another 3 months.

So while the rest of America can begin to embrace boots, jackets, and cocoa weather, we in Florida can enjoy this cool pasta salad (and our bikinis) for a little longer! 

I love, love, love basil pesto. It’s nutty, it’s slightly sweet and it’s perfect with pasta. The best part is you can use it sparingly and still come out ahead with tons of flavor. I prefer to buy my pesto from the store (Bertoli makes a great one!) but feel free to make your own with fresh basil, toasted pine nuts, and olive oil.

Pesto Pasta Salad


Makes approximately 8, ½ cup servings.

  • 2 tablespoons prepared basil pesto (or make your own!)
  • 1 tablespoon olive oil
  • 4 cups cooked bowtie (farfelle) pasta
  • 1 cup cubed, fresh mozzarella
  • 1 cup fresh spinach chiffonade*
  • ½ cup pepperoni slices, cut into quarters
  • Salt, and pepper, to taste

  1. In a large bowl, whisk the pesto and olive oil. 
  2. Add the still warm bowties, and spinach and stir to combine. The heat from the pasta will slightly wilt the spinach. 
  3. Gently fold in the pepperoni and mozzarella. 
  4. Add salt and pepper to taste. 
  5. Serve immediately or chill for 4-24 hours. 
  6. Garnish with a sprinkle of Parmesan cheese,  if desired.

(*to chiffonade, simply roll a handful of spinach leaves tightly then thinly slice into strips. It’s more visually pleasing than torn spinach and you won’t get big hunks of greens in every bite!)

Simple, Delicious, Done!

Love, 
Shauna E


Sunday, September 2, 2012

Ridiculously Easy Recipe: Luscious Sweet Potato Latkes


All through college (and now as part-time on the weekends), I worked at a NY-style deli that specialized in Jewish delicacies such as chopped liver, knishes, challah and rye bread, nova salmon, matzo ball soup, and of course, potato pancakes. Potato latkes are a delicious marriage of shredded potatoes, onion, parsley, and egg formed into a patty and fried in oil. They are wonderful plain, or with a dollop of sour cream and applesauce. I’ve even had customers smother their potato cakes in maple syrup!

These potato latkes I present to you today are with a slight twist on the old classic: I used sweet potatoes. Sweet potatoes are, as the name suggests, slightly sweeter than their white counterparts. They are higher in fiber as well. The sweetness in sweet potatoes isn't sugary like you would expect, but a mild, earthy sweetness that is delicious when complimented with cinnamon, brown sugar, or butter. 

Just in time for Rosh Hashanah, these latkes are a perfect starter to a New Year’s Seder, or a simple side dish with grilled meat. I personally enjoy them with runny eggs at breakfast! No matter how you slice it, these sweet potato latkes are divine.

Shauna’s Sweet Potato Latkes (adapted from www.allrecipes.com )
Makes about 20 small latkes

You will need:

  • 2 sweet potatoes, peeled and grated (about 2 cups)
  • ½ cup sweet yellow onion, grated
  • 1 egg, slightly beaten
  • 1 tablespoon honey
  • 2 tablespoons all purpose flour
  • ½ tsp ground nutmeg
  • 2 tsp ground cinnamon
  • ¼-1/2 cup vegetable oil, for frying


  1. Peel and grate the sweet potatoes and onions. Place a cheesecloth or paper towels over the mixture and squeeze out any excess liquid. Let the potatoes sit to release more liquid, then squeeze again.
  2. Place the potatoes, onion, egg, flour, cinnamon, and nutmeg in a bowl and stir to combine.
  3. Form the mixture into small, 2” patties.
  4. Heat the oil and fry 2-3 minutes until brown, then flip and cook another 2-3 minutes until golden brown.
  5. Place cooked latkes in a warm oven while you continue to fry until the mixture is done.
  6. Serve with a drizzle of honey, and greek yogurt or sour cream for dipping.

 Enjoy!

Questions? Comment Below!

XOXO

Shauna E!

Sunday, August 5, 2012

Technique of the Week: Scratch-Made Chocolate Cake


Where do you all find your recipes? Blogs like this? Internet search? Pinterest/Tumblr? Family and friends? Old cookbooks with dog-eared pages, worn at the binding from years of flipping through?

For me, it's all of the above! I love drawing inspiration for cooking and baking from everything I see. If I'm online and I stumble across a recipe that looks interesting, beautiful, or challenging, I book mark it for future use. I currently have a folder around 350 links of recipes I've found and/or tried.

Before a few years ago, one place I never thought to look for recipes was on the packaging of food ingredients themselves, which is where today's chocolate cake recipe comes from. A couple of years back, I searched, and searched, and searched some more for the perfect chocolate cake recipe for my father's 43rd birthday. I'm the baker of the family, so birthday treats tend to fall to me (like I mind!) After finding 30 recipes that all contradicted each other, I went to the store to settle on a boxed cake mix instead. Browsing through the aisles, I picked up a container of Hershey's cocoa powder, flipped it over, and lo-and-behold the simplest, most delicious sounding chocolate cake recipe ever appeared in my vision. The best part? Aside from the cocoa powder itself, I had every single ingredient I needed in my pantry at home PLUS everything to make the accompanying frosting (also featured on the canister.) You had better believe I high-tailed it out of there and ran home to make it!

This recipe is so very easy and you can take all the credit when you serve it to your family and friends. It takes only minutes more than a typical boxed cake mix to assemble. Boxed cake mixes are WONDERFUL in a pinch, but nothing compares to a fresh-made, melt-in-your-mouth slice of homemade chocolate cake with chocolate frosting. Pair it with a scoop of vanilla ice cream and watch out...pure Heaven.

(A note: If you are strapped for time, make the frosting the day before. It will hold beautifully in the fridge for a day or two...just be sure to let it come up to room temperature before you frost the cake!)

"Perfectly Chocolate" Chocolate Cake 
(adapted from the Hershey's baking website)

(Photo credit to my sister, Newlywed Nichole)


Serves 10-12

You will need:

·         2 cups granulated sugar
·         1 3-4 cups white flour
·         3/4 cup Hershey's (or other brand) unsweetened cocoa powder
·         1 1/2 tsp baking soda
·         1 1/2 tsp baking powder
·         1 teaspoon salt
·         2 eggs
·         1 cup milk
·         1/2 cup vegetable oil
·         2 teaspoons vanilla
·         1 cup boiling water


Hardware:

·         2, 9-inch cake pans
·         Microwave to melt butter and boil water (stove-top works just as well)
·         Sifter (optional, but helps make the texture even more amazing)
·         Stand mixer, or hand mixer (optional as well, but will make your life infinitely easier!)


1. Pre-heat your oven to 350 degrees. Meanwhile, grease your cake pans with butter and flour, or cooking spray.

2. Over a large bowl, sift together flour, white sugar, cocoa powder, baking powder, baking soda, and salt. If you do not own a sifter, than just mix the 6 ingredients together until well combined. 

3. Add the eggs, milk, oil, and vanilla and stir. 

4. Gradually add the 1 cup boiling water and combine until you have a relatively thin batter. Do not worry as this is how it's supposed to look! 

5. Divide the batter evenly between the two cake pans.

6. Gently drop (from less than 1 inch high) each pan on a counter (gently!) to release any air bubbles and distribute the batter.

7. Bake at 350 degrees for 30-35 minutes, or until a toothpick in the center comes clean. (A note: My oven cooks super fast so it only took me 22 minutes for my cakes to be set. Make sure you set a time for half the suggested time, check the cakes, then proceed from there!)

8. Remove the cakes from the oven, and allow to cool for at least one hour before removing from the pans. 

9. Frost with "Perfectly Chocolate" Chocolate Frosting (recipe follows)

10. Enjoy with a scoop of vanilla ice cream, or a generous dollop of fresh whipped cream!


For the frosting (can be prepared up to two days in advance):
Make 2 cups and will frost 2, 9-inch round cakes

You will need:

·         1 stick butter
·         2/3 cup Hershey's (or other brand) unsweetened cocoa powder
·         3 cups powdered sugar*
·         1/3 cup milk (plus more in case you need to thin it out later)
·         1 tsp vanilla

*Make sure to taste your frosting in between intervals. Three cups of powdered sugar proved to be extremely sweet for my family's tastes so I normally start with 1 1/2 cups and increase from there. This is purely preference though!

1. In a microwave safe bowl, microwave the butter in 15-second intervals until melted.

2.  Add the cocoa powder to the melted butter and stir until well blended.

3. Alternately add the powdered sugar and milk, beating to a spreading consistency. 

4. Add a small amount of additional milk, if needed. 

5. Stir in vanilla extract.

6. At this step, you can put the frosting away until ready to use. Be sure to allow it to come back to room temperature and stir before applying it to the cake.

Once you're ready to assemble:

To release the cakes, run a knife along the edges of the pan, then with a clean plate or piece of cakeboard covering the top, gently turn the cake over. Do not shake or jostle the cake if it doesn't immediately come free, instead gently knock on the bottom of the pan and allow to rest for several minutes, and attempt to release again.

To frost, place one layer on the cake (bottom-side down) on a clean plate or piece of cakeboard, gently spread a thin layer of frosting on the top portion of the cake, then top with the second cake. Frost the sides while turning the plate until well-coated and even. Frost the top, then adorn with any decorations such as candies, letters, or chocolate shavings.


Questions? Comments? Drop me a note below!

XOXO

Shauna

Quick and dirty Q&A

1. Is there a way to turn this cake into cupcakes? 

·         Yes! Simply skip the step for greasing and line your cake pan with the liners of your choice before baking. This recipe will make around 30 cupcakes. You will want to decrease the baking time to 12-14 minutes (checking at 6 minutes for your oven.) 


2. Chocolate cake with chocolate frosting is too decadent for me. Have you any other variations for the frosting?

·         Absolutely! To make cream cheese frosting, simply omit the cocoa powder and replace it with 8oz softened cream cheese. For orange cream cheese frosting, swap out the vanilla for orange extract and the milk for orange juice. For a standard buttercream frosting, simply combine the butter, milk, powdered sugar, and vanilla as listed above, just omitting the cocoa. You could also make a peanut butter frosting for this by omitting the cocoa and adding half a cup of creamy peanut butter (or a few tablespoons of PB2) to taste. The possibilities are endless!


3. How do I grease the pan with butter? Should it be melted?

·         No. DO NOT MELT THE BUTTER. You want room temperature butter for this. You can also use cold butter but the spreading consistency isn't great and it's dicey whether or not the flour will stick. On a paper towel, place a 1/2tablespoon of butter, and gently rub along the inside of the cake pan, paying special attention to the inside rims. These are the spots that are most prone to sticking later on. Next, take a tablespoon of flour and swish it around the pan until all sides, bottom, and rims are coated. Discard excess flour into the sink or trash can. There are numerous cooking sprays with flour in it for baking purposes like these, but good old fat and flour is the method I have found to work best over the years. 


4. If I make the frosting ahead of time, why do I need to refrigerate it? And why does it need to come to room temperature first?

·         In a nutshell, butter spoils. If you leave this frosting on the counter for a prolonged period of time, you run the risk of the frosting turning sour, and the possibility of making yourself or your family sick. You need to refrigerate the frosting, and then bring it to room temperature when you're ready to frost. Because of the butter in this, the frosting will harden when cold, and hard frosting will turn delicate cakes into delicate crumbs. 


Tuesday, July 24, 2012

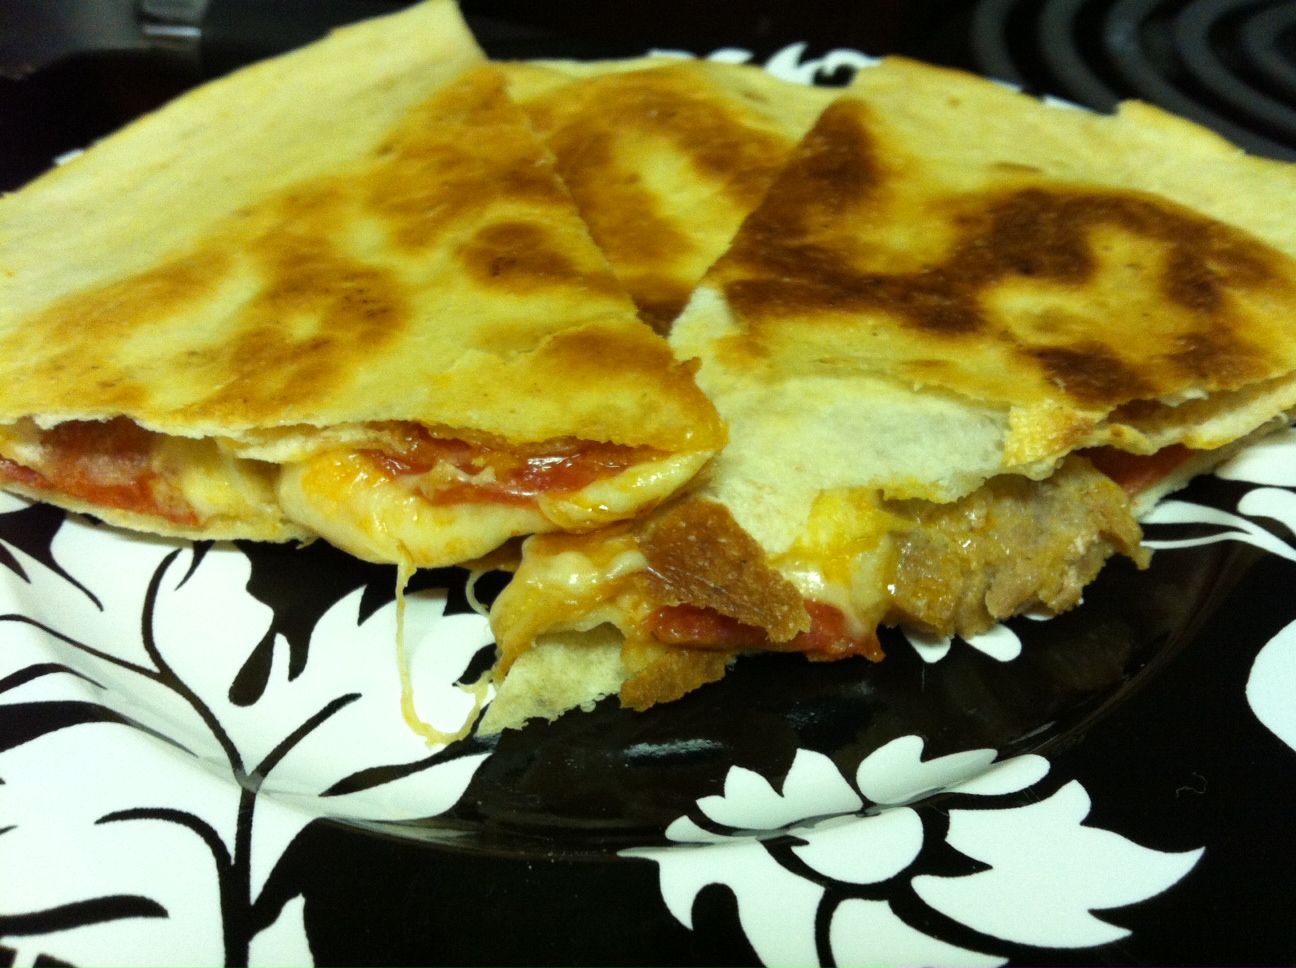
Ridiculously Easy Recipe: Pizzadillas

Has it really been 4 months since my last post? Did you miss me? I've missed you!

There have been lots of big changes in my life since my last post. I switched careers from serving to being a property preservation processor (don't ask me, I don't even know what it means), plus we switched apartments (loving the new place so much more than our last!) and now my husband and I are in the market for our very own furbaby. It's been incredibly hectic around here (more than I enjoy on a normal basis, wahhh) and I am so glad to be back into a normal routine!

As I mentioned, I recently switched jobs. It really doesn't pay any more than serving did, but there has been an added pressure of actually budgeting my money versus spending it as I go. For that reason, I've had to be much more thrifty with our food budget. I buy in bulk, I freeze whatever we won't use right away, and I've been trying much harder not to waste any food scraps that are leftover. A few tablespoons of sauce, some leftover cheese, and the last, abandoned tortillas from taco night are turned into an easy, creative meal that tastes just like a thin and crispy crust pizza. 

I'm actually pretty surprised I never thought to use tortillas like this before. Now I'm curious about other flavor combinations: What would a cubandilla be like? What about a greekdilla? The possibilities are literally endless! This sandwich would be perfect served with a salad as a light meal, or skip the large tortillas and op for minis instead. I'm betting these would make pretty terrific appetizers! 

Shauna E's Pizzadillas

(Sorry for the poor picture; I really need a new camera!)

Makes one pizza quesadilla (Double, or triple as needed!)

You will need:

  • 2 large tortillas (10" size is preferred)
  • Softened butter or butter spray
  • 1/4 cup prepared tomato sauce (plus extra for dipping!)
  • 3/4-1 cup shredded mozzarella cheese, enough to cover one tortilla (I like a lot of cheese)
  • 2 tablespoons grated Parmesan cheese
  • 1/2 tablespoons dried Italian herbs
  • 1/2 tablespoon garlic powder
  • Pepperoni, ham, sausage, sun-dried tomatoes, bell peppers, or any other pizza toppings you like!


The trick with this recipe is to go light on the ingredients: less is more. You don't want to bog down the crust with a lot of weight and lose the crispiness on the outside!


  1. Brush each tortilla lightly with softened butter.
  2. Place one tortilla butter-side down on a preheated skillet or grill.
  3. Quickly smear on a thin layer of tomato sauce, and top with mozzarella cheese.
  4. Layer on any toppings you prefer, remembering to go sparingly with them.
  5. Grill for 2 minutes or until cheese is mostly melted.
  6. Sprinkle on Parmesan cheese, garlic powder and Italian herbs.
  7. Top with a second, buttered tortilla.
  8. Using a spatula, carefully flip the entire thing over and grill until second tortilla is crispy.
  9. Remove first pizzadilla from the heat, cut into halves or quarters. 
  10. Serve with additional warmed tomato sauce.

Questions? Ask below!


XOXO

Shauna E!


Sunday, December 4, 2011

Shauna E's Easy Eats!


Welcome to Shauna E's Easy Eats, the blog dedicated to helping new home cooks create simple, delicious meals on a shoe-string budget. Here you will find step-by-step recipes, tips and techniques and all sorts of savings!

Who is Shauna E?


I'm Shauna, formerly the author of the blog, The College Gastronome. After moving out of my parent's home and gaining some weight, I've gone back to the values of home cooking my parents instilled in my childhood. You can read that inaugural post here.

My recipes are geared towards home cooks with little experience in the kitchen, but all are welcome. Recipes are in a step-by-step format, usually with pictures and always followed by a quick-and-dirty, question-and-answer session to dissect any complicated ingredients or techniques the reader may have.

If you're still confused or unfamiliar with something in a recipe, you can always feel free to comment below!

Questions? Comments? Click below!


Simple, delicious, done!

Shauna E :)