Sunday, October 28, 2012

Ridiculously Easy Recipe: 10-Minute Chorizo Pasta

I  recently discovered my local Italian grocer sells chorizo! 15 varieties to be exact, but they also make their own house version which I picked up at a bargain for under $5.00 a pound.

Chorizo is a slightly spicy smoked pork and paprika sausage that hails from Spain. It's texture is more dry and crumbly than a regular sausage, and the flavor is out of this world. The best part about chorizo is because it is smoked, it's flavors are highly concentrated so less is more. That pound I bought is going to last me a good, long while! I love to use chorizo is sauteed dishes because it's high fat content really helps to season the rest of the ingredients in my recipe without adding a ton of extra oil.

This dish is great over rotini pasta, and can be served as a main meal with garlic knots and a small salad, or even as an appetizer for when you have company. The hit of parmesan at the end is completely optional but I feel the salty tanginess really helps to pull the spicy flavors together for a truly excellent dish. The best part though? This recipe is so easy it takes only around 10 minutes to prepare!  

10-Minute Chorizo Pasta 


Serves 2 (or 1 if you're really hungry)

1 teaspoon olive oil, or about a 10 second spray with your Misto
1/2 small onion (about 1/4 cup), diced
1 clove garlic, minced
1 link chorizo sausage*, about 3 ounces, coarsely chopped
1 small tomato (Roma), chopped
1 cup spinach, stems removed and torn (you could also practice you chiffon skills here too!)
1/4-1/2 cup chicken broth
2 cups cooked rotini pasta tossed with 1 tablespoon butter or butter spray
2 teaspoons Parmesan cheese (optional)

*I'm not positive if chorizo is something people can get all over the country. If you're unable to find it, substitute your favorite cooked sausage and up the oil to 2 teaspoons.


  1. In a medium skillet, heat the oil on medium high and add the onions, garlic, and chorizo. 
  2. Cook for 3 minutes until the onions and garlic are soft.
  3. Add the tomato and spinach and saute another 3 minutes. 
  4. Add chicken broth or stock and let reduce to the point where the mixture is saucy but not soupy, about 3 minutes. 
  5. Serve hot over cooked pasta, and top with fresh parmesan cheese.
Enjoy!

Simple, delicious, done!

XOXO

Shauna E

Questions? Comment below!


Sunday, October 14, 2012

Ridiculously Easy Recipe: Parmesan Sweet Potato Fries

Parmesan Sweet Potato Fries

After a year of deliberating, I finally signed up for a Pinterest account. I hemmed and hawed for a long time, thinking it to be just a cheap knock-off of my beloved Tumblr.

I was wrong.

Aside from the fun "pinning" system, I just feel much more organized using Pinterest to bookmark recipes than my previous method of keeping them in my browser folder. Not to mention, I can access my recipes from my phone instead of having to look up the recipe on my laptop, then either copy the url to my cell, or print it out.

This recipe for sweet potato fries was the very first recipe I pinned, and the very first recipe I used. Like the original author mentions, sweet potato fries are NOT the same as regular french fries. They are delicious, and they are healthier, but they are in no way a perfect substitute to a basket of crispy, golden potato fries. The little bit of cornstarch (I used flour because that's what I had on hand), does ensure a crunchier crust than normal fried sweet potatoes.

I tweaked the original recipe to include this delicious spice mixture of garlic salt, pepper, parsley, and Parmesan cheese. I'm not a big fan of the traditional flavors paired with sweet potatoes (cinnamon sugar being the most popular it seems,) but feel free to substitute whatever toppings you like or even just leave them plain. They're delicious any way you toss 'em.

Sprinkle with handfuls of parmesan, parsley flakes, and spices.
Soak sweet potato slices for 30 minutes up to 8 hours to remove some of their starchiness
This oil may look hot enough, but it's not.
This oil is the perfect temperature to steam the fries inside but crisp them up outside.

Parmesan Sweet Potato Fries 


Makes 2-4 servings

For the fries:
  • 2 large sweet potatoes, peeled
  • Bowl of cool water
  • 1-2 tablespoons flour or cornstarch
  • Vegetable oil, for frying
For the spice mixture:
  • 2 tablespoons parmesan cheese, shredded or powered
  • 1 teaspoon garlic salt 
  • 1 tablespoon dried parsley, or fine dice fresh if that's what you have on hand
  • 1/4 teaspoon black pepper
  1. Very carefully cut your sweet potatoes into fries. The best way to do this is to halve the potatoes, then halve again, then cut into uniform little strips. You want them to be in between shoestring and fast food fry thickness. Soak the "fries" in an ice bath for 30 minutes or up to 8 hours before you're going to use them.
  2. When you're ready to cook, pre-heat your oil on 400 degrees or set a heavy bottomed skillet to medium high. You'll know it's hot enough when a drop of water splatters in the oil.
  3. Drain the potatoes and toss in flour until lightly coated.
  4. Fry in the hot oil* for 7-10 minutes or until golden brown. You may need to do this in batches depending on how big your fryer/pan is, so keep a foil lined piece of aluminum foil in a 250 degree oven to keep the first batches warm. Be careful not to overcrowd.
  5. Once you are finished frying, plate the finished fries on a paper towel lined bowl or plate and sprinkle generously with the herb/spice mixture. 
  6. Serve with ketchup, mayo, or just plain on their own.
*Be careful! Oil burns are not fun at all. Make sure you have a fire extinguisher or a box of baking soda nearby any time you're frying to easily extinguish any accidental grease fires. Additionally, never EVER leave hot oil unattended. 

Questions? Comment below.

Simple, delicious, done!

XOXO
Shauna E!

------------------------------------------------------------------------------------------------

Quick and Dirty Q&A with Shauna E

1. Why do I need to soak the potatoes first?

Soaking the sweet potatoes in water will help draw out some of their natural starchiness, which in turn will help them stick to each other less during frying. Less sticking equals a crispier fry!

2. Deep frying is do fatty! What are my other options?

It's no secret, the more fat you cook with something, the tastier it will become. While I do believe everything is great in moderation, there are ways to lighten this recipe up. For lighter fries, simply preheat your oven to 450, then spread the floured fries onto a foil-lined baking sheet (for easier clean-up) and drizzle the fries with 2-4 tablespoons of olive oil and smoosh around with your hands. Bake for 12-15 minutes, flipping once and adding more oil. Please note that oven-baked fries will NOT look as crispy as the fries pictured above but they will still be delicious.

3. How can I make sure my fries come out as crispy as when I go to a restaurant?

First of all, make sure you have PLENTY OF OIL. Make sure there is enough oil to cover the potatoes, and then some. For a 10" skillet, I used approximately 2 cups, and even added a little more with the second batch. Second, make sure your oil is HOT!!! See the two pictures precluding the recipe for some examples of how your oil should and shouldn't look when you're cooking. Additionally, attempt not to overcrowd the skillet/fryer. Adding too much at one time will lower the temperature and cause sticking. Remember: The less stickiness  the more crispiness. And always, NEVER EVER leave anything you're deep frying unattended, and always have a method to extinguish nearby just in case.


Friday, October 12, 2012

Foodie Friday:Go Go Gadget Edition

Happy Friday readers! I'm writing from my desk at work where we have approximately 14 orders for 7 processors so... yeah. Blog time, woop!

Tomorrow is the big day! Our boy Regi comes home from Ocala and I couldn't be more thrilled. My husband has gone crazy buying the little stinker every toy a puppy could need, and I've been reading up on training and how to be the best pet owner ever.  I've also book marked so many recipes for homemade puppy treats! I can't wait to spoil our little man rotten.

Okay, okay, enough about the pup already! You're here for the food!

Today I want to talk about my 3 favorite gadgets/tools in the kitchen. These items really motivate me to WANT to cook, instead of just getting through it.

1. Misto Gourmet Olive Oil Sprayer, $9.98

Photo courtesy of Amazon.com


The Misto is an oil spritzer. Instead of using those PAM sprays that are full of propane and who knows what else, you fill the reservoir of the Misto with your favorite oil (olive for me!), pump the lid a few times, and viola! Homemade non-stick spray with natural ingredients. The design is unobtrusive enough to sit out on the counter without looking gaudy. I use my Misto on the grill, sautee pan, when baking, and even to top my salads.

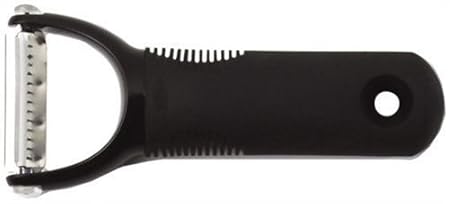
2. OXO Good Grips Julienne Peeler, $9.99

Photo courtesy of Amazon.com


I always assumed people made those gorgeous squash pastas and matchstick veggies using careful knife techniques, or a mandolin slicer that costs $2727437247. I was wrong though; all I needed was a sweet julienne peeler. My best friend Katie got me one as part of my birthday gift this year, and boy am I ever grateful. The very first thing I made with my julienne peeler was fresh zucchini pasta. This is a tool that takes some practice though! You have to have patience and slice the peeler slowly over the surface you're cutting, while also assuming a firm grip. You also have to be very aware of hand placement, or you'll surely loose some skin! The time and practice pay off though the first time you have a beautiful bowl of thin carrots for coleslaw or to top salads.

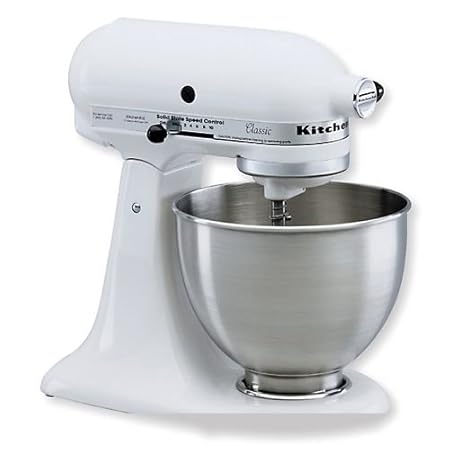
3. KitchenAid Stand Mixer, $258.99

Photo courtesy of Amazon.com

Hands down, the BEST kitchen gadget I have or will ever have. The stand mixer does it all- mixes, kneads, mashes, separates  and so much more. There are literally 50 attachments you can add to this mixer to make it even more kick-ass such as an ice cream maker, slice and dice, or pasta maker. I received this mixer from my parents the year I got into baking (had to do something instead of homework, right?) and it's been my  BFF ever since. Initially my mixer was just for making mashed potatoes, and mixing cake batter, but recently I've learned it can do so much more. It will knead dough, it will separate cream into butter, or whipped cream. Yes, it's a lot of money. However, it's an investment. With proper care, you'll never have to replace it, and it will literally last 30 years or longer. I highly recommend making the investment!


Well kids, that's all I've got. Three amazing kitchen gadgets that make my life in the kitchen a little easier, and more fun. I hope you all have a fantastic week, and stay tuned for Sunday's post!


Wednesday, October 10, 2012

Ridiculously Easy Recipe: Barbecue Chicken Pizza

Almost a month and no updates? I am truly awful. Between my best friend's wedding, getting sick, an impromptu visit from my pregnant sister-in-law, my sister getting a new dog (Oskar is too cute!), AND preparing for our own fur baby, I have been overwhelmed! Despite all that though, I've been cooking up a STORM.

I turned a little bit of Walter (my sourdough starter) into the most amazing, melt-in-your-mouth biscuits. I made shrimp scampi, mushroom risotto, and carrot, ginger, and rosemary soup all for the first time that were amazing.

In the interest of honesty, I also made the worst biscuit gravy ever recently. I decided to use buttermilk instead of 2% and it was vile. Too sour, too salty, not even close to the thick, creamy sauce I was dreaming about. My husband was kind enough to rave about the nasty dish, but I know the truth.

One thing I've made lately that I have LOVED and will make over and over again is this barbecue chicken pizza.  It's no secret I'm not the biggest fan of tomato sauce OR pizza. When the choices for take-out are presented to me, I'll always choose Chinese, tacos, or a sandwich over the famous Italian pie.

This pizza is different though--it combines tangy barbecue sauce with cooked chicken, creamy cheeses, and sweet red onions. A touch of cilantro at the end brings this pizza from home-chef to professional elegance, and really balances out the sweetness of the other ingredients.  This pizza is a great weeknight meal with a salad, or double the ingredients and make two (or 10!) to serve on game day.


Barbecue Chicken Pizza 

Tastes just like the one you can order from California Pizza Kitchen, but without the huge price tag!
Makes 1 pie

You will need:

  • 1 cup cooked chicken breast, chopped, shredded, or cut into strips
  • 2 cups mozzarella, or fontina cheese (or mix the two!)
  • Your favorite bottled barbecue sauce (I like Sweet Baby Ray's brand sweet vidalia onion bbq sauce)
  • 1/2 cup red onion, sliced thin (or more if you're an onion freak like Jeff and I)
  • 1/4 cup fresh cilantro, torn 
  • 1 pizza crust, either store bought or homemade*

*If your local grocery store has a bakery, chances are it puts out fresh pizza dough to buy. If you can't find it, or don't want to make your own, brands like Bertolli and Pillsbury make their own crusts. Make sure you follow the package directions before continuing with the assembly.

Pre-heat oven to 450. Generously flour your work space, then roll out the dough to your desired thickness/pan size. (I prefer to buy those disposable foil pizza pans but if you don't want to do this, either "free-style" your pizza or roll it to fit a standard 13x9 baking sheet.) Using a fork, poke holes liberally through the crust.

With a pastry brush or spatula, spread a thin layer of barbecue sauce on the crust, about 1/4 cup. Alternate sprinkling on the cheese and chicken until the pie is covered. You want some of the chicken to be under the cheese. Sprinkle on the red onion.

Bake for 15-20 minutes until the cheese is bubbling and the visible crust is golden brown.

Remove from the oven and sprinkle on the cilantro. Drizzle on additional barbecue sauce if desired. Allow to cool 10 minutes (if you can wait that long!), then cut into 8 equal-sized pieces.

Simple, delicious, done!

Shauna E!

Questions? Comment below!


Sunday, September 16, 2012

Ridiculously Easy Recipe: Pumpkin Spice Syrup

A little bit of Fall in sunny Florida

Fall is here! Fall is here! Fall is...Oh, that's right. I live in Florida, land of palm trees, old people and 87 degree Christmas'.

Autumn is but a faint memory for me after living in the Sunshine State for the last 18 years. In Florida, the signal Fall has began can really only be attributed to what flavors are removed and added to the restaurants in the area. Apples, pomegranate, and squash begin making an apperance. Pumpkin bursts out of every dish, both savory and sweet. When I worked at Starbucks a year ago, my best month there was the month we released the pumpkin spice latte and I learned how beautifully it paired with our chai syrup. That's why I was so excited to find this recipe for homemade pumpkin spice sauce. While I adore the  Starbucks version, $3.55 for my daily latte is a bit steep.

 This pumpkin spice syrup is great in coffee or espresso, or even as a topping for vanilla ice cream. My sister-in-law Allison swears by it with peanut butter on sandwich bread. Although there is no substitute for hay rides, rolling around in crunchy leaves or the cool smell in the air as summer fades away, this pumpkin spice syrup comes pretty close!

Whisk vigorously to prevent scorching

Stir through a mesh strainer to remove any grainy pieces and create a smoother sauce

Perfect for lattes, ice cream topping, or plain on it's own!


Pumpkin Spice Syrup

Makes 8-12 servings

2/3 cup pumpkin puree (canned is fine, but make sure it's pure pumpkin not pie filling!)
2/3 cup white sugar
1 teaspoon ground cinnamon
1 teaspoon pumpkin pie spice (or equal parts ground ginger, ground cloves, and ground nutmeg)
1 1/4 cup water
1/2 teaspoon vanilla

  1. In a heavy sauce-pan, combine the ingredients and bring to a boil, stirring constantly to prevent burning.
  2. Let the mixture cook down for 10-15 minutes until thick and syrupy (best test is whether or not it coats the back of a spoon)
  3. Remove from heat, and strain over a fine, mesh strainer or pour through a cheesecloth to catch any chunky bits.*
  4. Store in the refrigerator and stir 2-3 tablespoons into your morning coffee or espresso for a special treat. I've found it's also marvelous as an ice cream topping. 
*not required but I really disliked the chunky cinnamon/pumpkin bits in my first latte. If you don't mind the texture, feel free to skip this step! 

This weekend when I'm home with Jeff, we're going to experiment making our own pumpkin spice frappes in the smoothie maker! I can't wait! 

What are your favorite fall recipes? Comment below!

Simple, Delicious, Done!

XOXO

Shauna E!

Friday, September 14, 2012

Foodie Friday: September 14, 2012

Welcome to Foodie Friday! Foodie Friday is a freestyle segment of Easy Eats where I entertain you with a story or two, regale you with my latest successes (and failures!) in the kitchen, and provide reviews of my favorite new food products and gadgets!

Last Sunday I got on a cooking frenzy and made a roast chicken in my crock pot. I stuffed that baby with rosemary, parsley, lemon, and garlic and set it on high for 3 hours until the meat literally fell off the bones! All week we whittled away at it making chicken and mushroom skillet, curried chicken salad, and barbecue chicken over brown rice. I wish I had a picture to show you all, but of course I forgot to take one. This is definitely something I plan to make often! The ingredients were under $10 total and make at least 5 meals for us throughout the week.

Rosemary, parsley, garlic, lemon for my roast chicken
On Sunday, I also whipped up a batch of oven-roasted tomatoes. Now, I'm not normally a tomato person (at least not fresh), but these babies taste like sweet candy. Simply halve and core a pint of grape or cherry tomatoes, toss in a little olive oil, then spread on a (lined) oven pan and bake at 350 for 30-45 minutes. Once they are done, sprinkle with a tablespoon of sugar, a grind of salt, and roast an addition 10 minutes until they turn a rich, deep red color. These are insanely good in salads, pastas, wraps, or even just on their own. I had to stop myself from eating the whole pint in one sitting!
Oven-roasted tomatoes are nature's candy

Monday, Tuesday and Wednesday were hellish days at work. Half our office is out with the flu, so every day I stayed late. By Wednesday I had almost 35 hours! I was so exhausted Wednesday I made Jeff take me to dinner instead of cooking. Of course after such a busy week, I woke up sick myself on Thursday. After getting myself to the doctor's, (and calling off of work) I spent the day sleeping, and being a bum. It was much needed. 

I had today off too, so I've been cleaning and cooking all day. I stopped at one point to make my new favorite beverage, a club soda and lime. We had an abundance of limes from the farmer's market two weeks ago and I couldn't think of any other way to use these bad boys up. Although sugar-free, it does remind me of soda which is nice when I'm craving something other than water or coffee. 

My refreshing, post-cleaning treat: Lime and club soda spritzer

Lastly, I FINALLY got around to mixing up this sourdough starter I ordered months ago from Amazon. Sourdough is a lot like a baby; you have to feed it, and baby it until it's just right. Every 12 hours I have to add flour and water to the sourdough yeast. After a few days I'll throw out (or turn into pancakes) about 1 cup of the starter to give it more room to breathe and grow. Yes, it's odd to think of yeast as a living thing but it most certainly is! I cannot wait until I can start pulling from this jar to make amazing rye bread, or English muffins from scratch. Jeff does not know how lucky he is to have a partner like me!

Patience is a virtue.
So how was your week? What cooking highs and lows did you experience? Comment below!

Simple, Delicious, Done!

XOXO

Shauna E!

Sunday, September 9, 2012

Technique of the Week: Outstanding Homemade Oatmeal Packs

It's obviously no secret that the more processed and convenient a food is, the more money it will cost. Diced celery will always cost a bucket-full more than it's stalk counterparts. Dried beans, while being more expensive per unit, will always be a better value than the canned stuff because of the amount of servings one bag holds. The cost of ingredients needed to make popcorn at home are still less than the bagged, microwave ready stuff. I could go on for hours, trust me...

Possibly the worst offender is pre-packaged oatmeal. These little envelops are chock full of calories, unnecessary additives for "freshness" and grossly overpriced. 10 tiny little packs for almost $5.00? You have to eat 3 of them to feel full! No way!

I learned awhile ago (total "duh" moment on my end!) that it's easier to just buy the tub of quick oats and make my own flavored oatmeal concoctions. A container of oats has about 30 servings and will run you around $2.50. Throw in some brown sugar, a bag of nuts, and some dried fruit and you're up to a little over $7.00 for three times as much oatmeal as the boxed stuff. The best part? YOU can control exactly how much sugar, sodium, and preservatives go into each pack, therefor making it loads healthier. Give it a try!

Pre-Portioned Oatmeal Packs


Makes 5 individual servings

You will need:

  • 5 sandwich or snack size zipper bags, or other small containers. 
  • 2.5 cups quick-cooking oats
  • 1/4 cup s dried fruit (I used cherry-infused cranberries)
  • 1/4 cup crushed nuts (I had macadamia nuts on hand but almonds, walnuts or pecans would be great)
  • 1/4 cup brown sugar 
  • Cinnamon, to taste
  1. In a medium bowl combine all ingredients, making sure the brown sugar breaks up and is distributed evenly with the oats. Portion into small containers, about a heaping 2/3 cup per serving. 
  2. When you're ready to eat pour the contents of the bag into a bowl, and add 1 cup of water. 
  3. Microwave in 20-second intervals until the water is absorbed, about 1 minute total. 
  4. Enjoy!
A few tips: The ratio of mix-ins to oats is perfectly optional. I know most people would probably enjoy much more sugar in their oatmeal, but I don't have big sweet tooth in the mornings so for me, less is more. If you don't like nuts, skip them! The one important thing to account for is the water. Making sure you double the amount of water to oats is crucial in having oatmeal that isn't too dry. 

If you want to save on the bags/containers, you can also just store the whole she-bang in a large canister and pull 2/3 cup of the mixture out each time you're ready to eat. I leave these on my desk at work so the more portable, the better!

Simple, delicious, done!

Love,

Shauna E

Friday, September 7, 2012


Welcome to Foodie Friday! Foodie Friday is a freestyle segment of Easy Eats where I entertain you with a story or two, regale you with my latest successes (and failures!) in the kitchen, and provide reviews of my favorite new food products and gadgets!

This week has been ridiculous. I managed to work 45 hours in 4 days due to the Monday holiday, and boy am I wiped! Because of my crazy week, I took tonight to just relax, watch some TV (I scored the entire series of Boy Meets World from my little sister, hello!!!), and be a bum.


Part of my Friday night was making kale chips for the first time. My sister-in-law Allison tempted me to try them when she posted a simple recipe for them on her blog. I have to say, the texture and crunch were great, but the flavor left me flat. Don’t get me wrong, I love my greens! I think I overcooked them though, which gave them a slightly bitter aftertaste. I definitely think I will try them again soon, and maybe add some garlic salt and onion powder to the show to amp up the flavor.

In other news, I bought an ice cream maker a few weeks ago and I am in love. So far I’ve made pumpkin spice ice cream, strawberry ice cream, and chocolate toffee chip ice cream. I have so many recipes bookmarked in my recipes folder that I want to try.

The pumpkin spice tasted like pure heaven; it was sweet, it was creamy, and the pumpkin came through wonderfully. The strawberry was OK; it lacked a wow-factor that really makes me want to experiment to get the fruity flavors to come through more (what do you think? strawberry extract? more puree? less puree?)

The best of all three was the chocolate toffee chip which is funny because I literally whipped it up in 5 minutes once I realized I still had a ton of ice and salt left over from making strawberry! (Don’t judge me, I don’t like to waste stuff!)

I went for a 4-quart maker which means it’s gigantic, and I haven’t made larger than a quart at a time. It’s nice to know that I have the option to though! A pint seems to work just fine for 2-3 people though, and it isn’t like regular store-bought ice cream—you have to eat it pretty quick or the texture changes.

So, what’s up for your weekend, dear followers?  

Stay tuned for Sunday's Technique of the Week--it's oatrageous!

XOXO
Shauna E!


Wednesday, September 5, 2012

Ridiculously Easy Recipe: Pesto Pasta Salad


As summer draws to a close for the rest of the country, Florida summer rages on. Today the temperature was 86 degrees and it won’t be getting any cooler for at least another 3 months.

So while the rest of America can begin to embrace boots, jackets, and cocoa weather, we in Florida can enjoy this cool pasta salad (and our bikinis) for a little longer! 

I love, love, love basil pesto. It’s nutty, it’s slightly sweet and it’s perfect with pasta. The best part is you can use it sparingly and still come out ahead with tons of flavor. I prefer to buy my pesto from the store (Bertoli makes a great one!) but feel free to make your own with fresh basil, toasted pine nuts, and olive oil.

Pesto Pasta Salad


Makes approximately 8, ½ cup servings.

  • 2 tablespoons prepared basil pesto (or make your own!)
  • 1 tablespoon olive oil
  • 4 cups cooked bowtie (farfelle) pasta
  • 1 cup cubed, fresh mozzarella
  • 1 cup fresh spinach chiffonade*
  • ½ cup pepperoni slices, cut into quarters
  • Salt, and pepper, to taste

  1. In a large bowl, whisk the pesto and olive oil. 
  2. Add the still warm bowties, and spinach and stir to combine. The heat from the pasta will slightly wilt the spinach. 
  3. Gently fold in the pepperoni and mozzarella. 
  4. Add salt and pepper to taste. 
  5. Serve immediately or chill for 4-24 hours. 
  6. Garnish with a sprinkle of Parmesan cheese,  if desired.

(*to chiffonade, simply roll a handful of spinach leaves tightly then thinly slice into strips. It’s more visually pleasing than torn spinach and you won’t get big hunks of greens in every bite!)

Simple, Delicious, Done!

Love, 
Shauna E


Sunday, September 2, 2012

Ridiculously Easy Recipe: Luscious Sweet Potato Latkes


All through college (and now as part-time on the weekends), I worked at a NY-style deli that specialized in Jewish delicacies such as chopped liver, knishes, challah and rye bread, nova salmon, matzo ball soup, and of course, potato pancakes. Potato latkes are a delicious marriage of shredded potatoes, onion, parsley, and egg formed into a patty and fried in oil. They are wonderful plain, or with a dollop of sour cream and applesauce. I’ve even had customers smother their potato cakes in maple syrup!

These potato latkes I present to you today are with a slight twist on the old classic: I used sweet potatoes. Sweet potatoes are, as the name suggests, slightly sweeter than their white counterparts. They are higher in fiber as well. The sweetness in sweet potatoes isn't sugary like you would expect, but a mild, earthy sweetness that is delicious when complimented with cinnamon, brown sugar, or butter. 

Just in time for Rosh Hashanah, these latkes are a perfect starter to a New Year’s Seder, or a simple side dish with grilled meat. I personally enjoy them with runny eggs at breakfast! No matter how you slice it, these sweet potato latkes are divine.

Shauna’s Sweet Potato Latkes (adapted from www.allrecipes.com )
Makes about 20 small latkes

You will need:

  • 2 sweet potatoes, peeled and grated (about 2 cups)
  • ½ cup sweet yellow onion, grated
  • 1 egg, slightly beaten
  • 1 tablespoon honey
  • 2 tablespoons all purpose flour
  • ½ tsp ground nutmeg
  • 2 tsp ground cinnamon
  • ¼-1/2 cup vegetable oil, for frying


  1. Peel and grate the sweet potatoes and onions. Place a cheesecloth or paper towels over the mixture and squeeze out any excess liquid. Let the potatoes sit to release more liquid, then squeeze again.
  2. Place the potatoes, onion, egg, flour, cinnamon, and nutmeg in a bowl and stir to combine.
  3. Form the mixture into small, 2” patties.
  4. Heat the oil and fry 2-3 minutes until brown, then flip and cook another 2-3 minutes until golden brown.
  5. Place cooked latkes in a warm oven while you continue to fry until the mixture is done.
  6. Serve with a drizzle of honey, and greek yogurt or sour cream for dipping.

 Enjoy!

Questions? Comment Below!

XOXO

Shauna E!

Sunday, August 5, 2012

Technique of the Week: Scratch-Made Chocolate Cake


Where do you all find your recipes? Blogs like this? Internet search? Pinterest/Tumblr? Family and friends? Old cookbooks with dog-eared pages, worn at the binding from years of flipping through?

For me, it's all of the above! I love drawing inspiration for cooking and baking from everything I see. If I'm online and I stumble across a recipe that looks interesting, beautiful, or challenging, I book mark it for future use. I currently have a folder around 350 links of recipes I've found and/or tried.

Before a few years ago, one place I never thought to look for recipes was on the packaging of food ingredients themselves, which is where today's chocolate cake recipe comes from. A couple of years back, I searched, and searched, and searched some more for the perfect chocolate cake recipe for my father's 43rd birthday. I'm the baker of the family, so birthday treats tend to fall to me (like I mind!) After finding 30 recipes that all contradicted each other, I went to the store to settle on a boxed cake mix instead. Browsing through the aisles, I picked up a container of Hershey's cocoa powder, flipped it over, and lo-and-behold the simplest, most delicious sounding chocolate cake recipe ever appeared in my vision. The best part? Aside from the cocoa powder itself, I had every single ingredient I needed in my pantry at home PLUS everything to make the accompanying frosting (also featured on the canister.) You had better believe I high-tailed it out of there and ran home to make it!

This recipe is so very easy and you can take all the credit when you serve it to your family and friends. It takes only minutes more than a typical boxed cake mix to assemble. Boxed cake mixes are WONDERFUL in a pinch, but nothing compares to a fresh-made, melt-in-your-mouth slice of homemade chocolate cake with chocolate frosting. Pair it with a scoop of vanilla ice cream and watch out...pure Heaven.

(A note: If you are strapped for time, make the frosting the day before. It will hold beautifully in the fridge for a day or two...just be sure to let it come up to room temperature before you frost the cake!)

"Perfectly Chocolate" Chocolate Cake 
(adapted from the Hershey's baking website)

(Photo credit to my sister, Newlywed Nichole)


Serves 10-12

You will need:

·         2 cups granulated sugar
·         1 3-4 cups white flour
·         3/4 cup Hershey's (or other brand) unsweetened cocoa powder
·         1 1/2 tsp baking soda
·         1 1/2 tsp baking powder
·         1 teaspoon salt
·         2 eggs
·         1 cup milk
·         1/2 cup vegetable oil
·         2 teaspoons vanilla
·         1 cup boiling water


Hardware:

·         2, 9-inch cake pans
·         Microwave to melt butter and boil water (stove-top works just as well)
·         Sifter (optional, but helps make the texture even more amazing)
·         Stand mixer, or hand mixer (optional as well, but will make your life infinitely easier!)


1. Pre-heat your oven to 350 degrees. Meanwhile, grease your cake pans with butter and flour, or cooking spray.

2. Over a large bowl, sift together flour, white sugar, cocoa powder, baking powder, baking soda, and salt. If you do not own a sifter, than just mix the 6 ingredients together until well combined. 

3. Add the eggs, milk, oil, and vanilla and stir. 

4. Gradually add the 1 cup boiling water and combine until you have a relatively thin batter. Do not worry as this is how it's supposed to look! 

5. Divide the batter evenly between the two cake pans.

6. Gently drop (from less than 1 inch high) each pan on a counter (gently!) to release any air bubbles and distribute the batter.

7. Bake at 350 degrees for 30-35 minutes, or until a toothpick in the center comes clean. (A note: My oven cooks super fast so it only took me 22 minutes for my cakes to be set. Make sure you set a time for half the suggested time, check the cakes, then proceed from there!)

8. Remove the cakes from the oven, and allow to cool for at least one hour before removing from the pans. 

9. Frost with "Perfectly Chocolate" Chocolate Frosting (recipe follows)

10. Enjoy with a scoop of vanilla ice cream, or a generous dollop of fresh whipped cream!


For the frosting (can be prepared up to two days in advance):
Make 2 cups and will frost 2, 9-inch round cakes

You will need:

·         1 stick butter
·         2/3 cup Hershey's (or other brand) unsweetened cocoa powder
·         3 cups powdered sugar*
·         1/3 cup milk (plus more in case you need to thin it out later)
·         1 tsp vanilla

*Make sure to taste your frosting in between intervals. Three cups of powdered sugar proved to be extremely sweet for my family's tastes so I normally start with 1 1/2 cups and increase from there. This is purely preference though!

1. In a microwave safe bowl, microwave the butter in 15-second intervals until melted.

2.  Add the cocoa powder to the melted butter and stir until well blended.

3. Alternately add the powdered sugar and milk, beating to a spreading consistency. 

4. Add a small amount of additional milk, if needed. 

5. Stir in vanilla extract.

6. At this step, you can put the frosting away until ready to use. Be sure to allow it to come back to room temperature and stir before applying it to the cake.

Once you're ready to assemble:

To release the cakes, run a knife along the edges of the pan, then with a clean plate or piece of cakeboard covering the top, gently turn the cake over. Do not shake or jostle the cake if it doesn't immediately come free, instead gently knock on the bottom of the pan and allow to rest for several minutes, and attempt to release again.

To frost, place one layer on the cake (bottom-side down) on a clean plate or piece of cakeboard, gently spread a thin layer of frosting on the top portion of the cake, then top with the second cake. Frost the sides while turning the plate until well-coated and even. Frost the top, then adorn with any decorations such as candies, letters, or chocolate shavings.


Questions? Comments? Drop me a note below!

XOXO

Shauna

Quick and dirty Q&A

1. Is there a way to turn this cake into cupcakes? 

·         Yes! Simply skip the step for greasing and line your cake pan with the liners of your choice before baking. This recipe will make around 30 cupcakes. You will want to decrease the baking time to 12-14 minutes (checking at 6 minutes for your oven.) 


2. Chocolate cake with chocolate frosting is too decadent for me. Have you any other variations for the frosting?

·         Absolutely! To make cream cheese frosting, simply omit the cocoa powder and replace it with 8oz softened cream cheese. For orange cream cheese frosting, swap out the vanilla for orange extract and the milk for orange juice. For a standard buttercream frosting, simply combine the butter, milk, powdered sugar, and vanilla as listed above, just omitting the cocoa. You could also make a peanut butter frosting for this by omitting the cocoa and adding half a cup of creamy peanut butter (or a few tablespoons of PB2) to taste. The possibilities are endless!


3. How do I grease the pan with butter? Should it be melted?

·         No. DO NOT MELT THE BUTTER. You want room temperature butter for this. You can also use cold butter but the spreading consistency isn't great and it's dicey whether or not the flour will stick. On a paper towel, place a 1/2tablespoon of butter, and gently rub along the inside of the cake pan, paying special attention to the inside rims. These are the spots that are most prone to sticking later on. Next, take a tablespoon of flour and swish it around the pan until all sides, bottom, and rims are coated. Discard excess flour into the sink or trash can. There are numerous cooking sprays with flour in it for baking purposes like these, but good old fat and flour is the method I have found to work best over the years. 


4. If I make the frosting ahead of time, why do I need to refrigerate it? And why does it need to come to room temperature first?

·         In a nutshell, butter spoils. If you leave this frosting on the counter for a prolonged period of time, you run the risk of the frosting turning sour, and the possibility of making yourself or your family sick. You need to refrigerate the frosting, and then bring it to room temperature when you're ready to frost. Because of the butter in this, the frosting will harden when cold, and hard frosting will turn delicate cakes into delicate crumbs. 


Tuesday, July 24, 2012

Ridiculously Easy Recipe: Pizzadillas

Has it really been 4 months since my last post? Did you miss me? I've missed you!

There have been lots of big changes in my life since my last post. I switched careers from serving to being a property preservation processor (don't ask me, I don't even know what it means), plus we switched apartments (loving the new place so much more than our last!) and now my husband and I are in the market for our very own furbaby. It's been incredibly hectic around here (more than I enjoy on a normal basis, wahhh) and I am so glad to be back into a normal routine!

As I mentioned, I recently switched jobs. It really doesn't pay any more than serving did, but there has been an added pressure of actually budgeting my money versus spending it as I go. For that reason, I've had to be much more thrifty with our food budget. I buy in bulk, I freeze whatever we won't use right away, and I've been trying much harder not to waste any food scraps that are leftover. A few tablespoons of sauce, some leftover cheese, and the last, abandoned tortillas from taco night are turned into an easy, creative meal that tastes just like a thin and crispy crust pizza. 

I'm actually pretty surprised I never thought to use tortillas like this before. Now I'm curious about other flavor combinations: What would a cubandilla be like? What about a greekdilla? The possibilities are literally endless! This sandwich would be perfect served with a salad as a light meal, or skip the large tortillas and op for minis instead. I'm betting these would make pretty terrific appetizers! 

Shauna E's Pizzadillas

(Sorry for the poor picture; I really need a new camera!)

Makes one pizza quesadilla (Double, or triple as needed!)

You will need:

  • 2 large tortillas (10" size is preferred)
  • Softened butter or butter spray
  • 1/4 cup prepared tomato sauce (plus extra for dipping!)
  • 3/4-1 cup shredded mozzarella cheese, enough to cover one tortilla (I like a lot of cheese)
  • 2 tablespoons grated Parmesan cheese
  • 1/2 tablespoons dried Italian herbs
  • 1/2 tablespoon garlic powder
  • Pepperoni, ham, sausage, sun-dried tomatoes, bell peppers, or any other pizza toppings you like!


The trick with this recipe is to go light on the ingredients: less is more. You don't want to bog down the crust with a lot of weight and lose the crispiness on the outside!


  1. Brush each tortilla lightly with softened butter.
  2. Place one tortilla butter-side down on a preheated skillet or grill.
  3. Quickly smear on a thin layer of tomato sauce, and top with mozzarella cheese.
  4. Layer on any toppings you prefer, remembering to go sparingly with them.
  5. Grill for 2 minutes or until cheese is mostly melted.
  6. Sprinkle on Parmesan cheese, garlic powder and Italian herbs.
  7. Top with a second, buttered tortilla.
  8. Using a spatula, carefully flip the entire thing over and grill until second tortilla is crispy.
  9. Remove first pizzadilla from the heat, cut into halves or quarters. 
  10. Serve with additional warmed tomato sauce.

Questions? Ask below!


XOXO

Shauna E!


Monday, March 26, 2012

Ridiculously Easy Recipe: Chicken Cordon Bleu Burgers

Let's face it: Ground chicken is not one of my favorite ingredients to cook with. It's a lot mushier than ground beef making it hard to work with, and you have to add TONS of spices to give it any flavor. I bought a pound (used half) of it a few weeks ago in an attempt to eat healthier and was disappointed. The leftover half went into the freezer and was promptly forgotten about until this morning when I rummaged through to take inventory.

In my head I wondered "what the heck am I going to make with this?!" There wasn't an option to throw it away because throwing away food is throwing away my hard-earned money! So, I turned to the internet and found a Rachel Ray recipe for Chicken Cordon Bleu Burgers. I liked the idea of Swiss cheese and ham on a burger, and it seemed like a great way to use up some of my mayonnaise and Dijon mustard. I made a few obvious tweaks such as swapping ham for the Canadian bacon and omitting the oil, shallots, and paprika.

These burgers turned out moist, juicy and flavorful! The dijonnaise sauce is what really ties it together. The ham is sweet, the cheese salty, tangy and creamy, and the ground chicken really soaked up the flavor of the steak seasoning and poultry herbs. If I was a skeptic about ground chicken before, now I'm an advocate!

Chicken Cordon Bleu Burgers

Serves 2

For the burgers:
  • 1/2 lb ground chicken breast (99% fat free)
  • 2 tablespoons poultry seasoning (I like Lighthouse's freeze-dried variety from Target)
  • 1 tablespoon McCormick Monterey Steak Seasoning
  • 1 tablespoon Dijon mustard
  • 1/2 teaspoon black pepper
  • 4 thin slices of deli ham (black forest or honey-maple variety)
  • 4 slices mild Swiss cheese
  • 2 hamburger buns (or bread of choice. I used onion rolls!)
  • Shredded lettuce, sliced tomato, or sliced red onion (optional)
For the sauce:
  • 2 tablespoons Dijon mustard
  • 2 tablespoons mayonnaise
  • 1 drop hot pepper sauce
  • ground pepper (to taste)
  • salt (to taste)

1. Make the sauce ahead of time by combining all ingredients in a small bowl and stirring. Refridgerate until ready to serve.

2. In a bowl combine the dijon mustard and ground chicken. Caution, it will be sticky! Next add the montreal steak seasoning, poutry herbs, and pepper. Portion the mixture into two patties, 4 ounces each and chill for at least 1 hour.

3. Heat a skillet or grill pan over medium-high heat. When hot add the ham slices and cook until slightly crispy on the edges, flipping once. Meanwhile, preheat your oven on the broil setting to toast the buns and melt the cheese later.

4. Remove the ham and set aside. In the same pan spray with cooking spray or olive oil. Add the chicken burgers and cook until juices run clean, about 4 minutes each side.

5. Remove the pan from heat and top each burger with two slices of grilled ham, and top with two slices Swiss cheese. Pop the whole pan in the oven (if possible) or transfer into a baking dish and broil for 2-4 minutes or until the cheese has melted.

6. Slice open and toast the buns under the broiler as well.

7. Remove everything from the oven, spread hal the dijonnaise mixture on the top and bottom of each bun. Place lettuce or other veggies on the bottom of each bun, then top with a burger.

8. Enjoy!

Questions? Comment below!

XOXO

Shauna E!

Quick and Dirty Q & A!

Q. I can't find ground chicken anywhere! What can I use instead?

A. Ground chicken is not always as common in grocery stores as other ground meats. My recommendation here would be to use ground turkey breast instead. I would avoid using ground beef as the flavor changes too dramatically. Although if you do want to use ground beef, you could always omit the poultry spice, add pickles and mustard and make yourself a Cuban burger instead!

If you want to stay true and use chicken, you could always swap the ground chicken for plain chicken breasts. Marinade them the same way adding a teaspoon of olive oil to help stick.

Friday, March 16, 2012

Technique of the Week: Sensational Stove-Top Popcorn


One of my very first jobs as a teenager was working in a concession stand at a movie theatre. We sold candy, hot dogs, nachos, soda, and of course that staple of the cinema: popcorn. One of my favorite tasks on a shift was to man the massive popper, adding the kernels and salt to the oil, and flipping the popped kernels into the basket at just the right moment. To this day, I can still open a paper bag with just a slight flick of my wrist!

I love popcorn. I love the way it smells, and I love the way it tastes when tossed in a little butter and salt. Sure, there are countless microwave varieties out there. In my pantry alone we have kettle popcorn, “homestyle” popcorn, and movie-theatre butter popcorn. I even have a few bags of the 100-calorie varieties but to be honest I have to eat two or three bags to be satisfied. Microwave popcorn is good for a snack in a bind but to me it tastes artificially and often times has the texture and aftertaste of cardboard.

A few weeks ago, I stumbled upon a recipe on Simply Recipes for stove-top popcorn. This is something I’ve always considered to be “too much work” or “too complicated” but really, it isn’t! All you need is a saucepan with a lid and some patience. After playing around with popcorn on the stove for a week or two, I’ve come up with this ratio below for popcorn for one. Feel free to double or triple as needed, making sure you use a larger saucepan/stockpot to account for the extra kernels. The trick is to swirl the pan so the kernels are constantly moving. Having your seasoning ready ahead of time will make the end result even tastier since the hot popcorn will stick better!

Swirl the kernels in your saucepan to coat aid in even popping

When you hear the popping begin to slow, remove from the heat.
My FAVORITE popcorn topping. This stuff is seriously addictive!
Make sure you let me know how you fare in the comments below!

Stove-Top Popcorn for One
(Makes about 4 cups)
You will need:
  • 1 quart saucepan with a lid
  • 2 teaspoons good quality oil such as canola, vegetable or olive oil*
  • 2 tablespoons dried corn kernels
  • ½ teaspoon of salt
  • 1 1-gallon ziplock bag
  • 1-2 tablespoon melted butter or popcorn seasoning to taste (I like to use Kernel Season’s White Cheddar variety!)
(*olive oil works fine here, but the popcorn will have a slightly fruitier taste than you are probably used to. I normally use canola oil)
  1. Add butter and/or seasoning to the Ziploc bag. Set aside for later.
  2. On a stove-top over medium-high heat, add oil and salt to the saucepan. Add 1-2 kernels to the oil and swirl the pan with lid on until they pop.
  3. Add the remaining kernels and continue swirling the pan until the popping slows to 1-2 seconds per pop, making sure the lid is on but slightly vented. This will help distribute the steam better and will result in denser, moister popcorn!
  4. Add hot popcorn to the prepared Ziploc bag and shake until seasoning is distributed.
  5. Serve immediately and enjoy!

Questions? Comment below!
XOXO
Shauna E!

Quick and Dirty Q & A
1) What are some other flavor combinations I can try instead of salt and butter?
  • I personally love my Kernel Season's White Cheddar flavoring. It's super salty which I love, and has a slightly tangy cheese taste.
  • You could make spicy popcorn by combining 1/2 teaspoon chili powder, 1/8 teaspoon pepper, and a tiny dash of cayenne. Simply add it to the butter in the bag, or skip the butter all together for a healthier treat.Another delicious combination would be a mixture of 1/2 tablespoon white sugar with a 1/4 teaspoon cinnamon. Play around! You could try chopped fresh herbs, Parmesan cheese... really anything would work!
2) Why should I stove-top pop? The microwave is so easy!
  • Aside from the flavor being far fresher than the commercial microwave varieties, stove popping is a good deal more affordable. A 16 ounce bag of corn kernels costs around $2.50 and will make countless servings where as a box of 6 bags of the microwave junk will cost you anywhere from $4.00-$6.00.